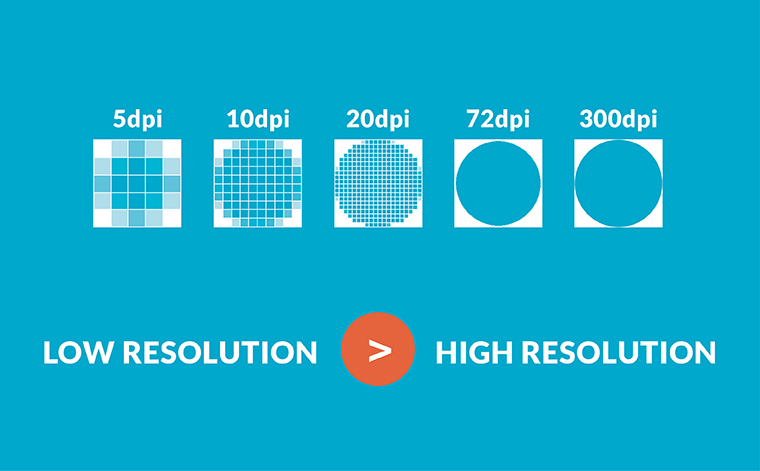
So, after my two-part series on file formats, File Types: Which One is Right for Me? and Vector vs. Raster? How To Choose The Right File Format, I realized I should probably elaborate on another key aspect of determining which files will work best for a project: high resolution vs. low resolution. This is the final key element in choosing the right image for your assigned task.
You may be thinking: why do I care if an image is high or low resolution if I have an image and it looks great? Sure, it may look great on your computer screen, but depending on your final output, the image may not hold up. There is a big difference between digital and print when it comes to resolution and what is required for an image to appear crisp and clear. In order to help you make sure you have the best image and help save you some time, here is a guide on “the basics.”
Step 1: What is image resolution?
Image resolution is the detail an image holds and is typically described in dpi. DPI stands for ‘dots per inch’ – the measure of the individual dots that can be placed in a line within the span of one inch. When viewing an image on your monitor, the dots are referred to as “pixels,” which are the smallest visual elements (tiny little squares) on a display screen. When viewing a printed image, the dots refer to the actual dots of ink on the page. The more dots per inch, the more detail and information the image holds. It also helps to make the image appear sharper, vibrant and vivid. The best way to visualize this is to think about whether 25 dots per inch or 300 dots per inch would make a clearer image.
Step 2: High resolution vs low resolution
So what is the key number? An image is high resolution (or high res) at 300 dpi. Anything 300 dpi or above is considered high res and anything under 300 dpi is considered low res. 72 dpi is the standard for low resolution or “screen resolution.”
Step 3: How do I tell the difference?
Generally the rule of thumb is: the larger a file size is, the higher the resolution needed. To find out whether your image will work for your project, there are a couple ways to determine the resolution of your image. If you know how to use Photoshop you can check out an image’s size under Image > Image Size. Or you try using this neat resolution calculator that I found. To use the calculator you will first need to determine the pixel dimensions of your image.
- For MAC: Select the image. Under “File” select “Get Info.” A pop-up window will open. Under “More Info.” select “Dimensions.” The image’s pixel dimensions will be presented as pixel width x height (e.g. 1200 x 800).
- For PC: Right click on the image file, look at “Properties,” and then the “Summary” tab. The image’s pixel dimensions are presented as pixel width x height (e.g. 1200 x 800).
Then go ahead and plug in the pixel dimensions of your image and how you plan to use it. The calculator will tell you the maximum usable dpi for your image.
Keep in mind: even when you have a seemingly large image (dimension-wise) that is low res, the usable dimensions decrease when “bumping up” the resolution. For example: if I have an image that is 20” × 20” at 72 dpi and I resize it to 300 dpi, the usable dimensions decrease to 4.8” × 4.8”.
Step 4: When to use High vs. Low Res?
High res images are great most of the time, and it is important to begin with the highest resolution and image dimensions you can get. You can always reduce size without losing quality — high res images also guarantee clear and sharp images — but you cannot do the opposite
There are a few exceptions where high resolution is not the best solution. This is true with images intended to be used online. The standard resolution for internet browsers is only 72 dpi, so anything you see online is automatically presented as low res. Also, low resolution is a safe bet if file size matters. Low res images have smaller file sizes, take up less space and load quicker. They are a great solution for email and other digital situations – where your image doesn’t need the detail required for printing.
Step 5: The exception
Vector-based images are the exception to the rule. You can read more about this in Vector vs. Raster? How To Choose The Right File Format. Resolution doesn’t apply to vector files. Unlike raster images which are pixel-based, vector files can be rescaled to any size without losing quality.
Now you know the difference between high resolution and low resolution. My best advice for you is that when you are unsure of what file works best, send the largest one you have because it’s better to have more information than not enough! It’s much easier for image editing applications, like Photoshop, to discard unwanted image information (reducing the size of an image) than it is to create new pixel information (enlarge an image). This way you have the most options for getting you the results you desire.

